Integration guide
WordPress setup
Install the Predax Security plugin and configure login protection, visitor blocking, VPN/proxy controls, and geo-blocking.
Prerequisites
- An Predax account with a live API key (register free)
- WordPress 5.8 or later, PHP 7.4 or later
- Admin access to your WordPress dashboard
1. Installation
- 1In your WordPress admin, go to Plugins → Add New and search for “Predax Security” (or open the WordPress.org listing).
- 2Click Install Now, then Activate Plugin.
- 3A new Predax Security menu (shield icon) appears in your WP admin sidebar.
2. Connect your API key
- 1Go to Predax Security → Settings.
- 2Paste your API key (starting with
prdx_) into the API Key field. - 3Click Test Connection — the status badge should turn green.
- 4Save settings.
Local dev / Docker
If WordPress runs inside Docker, do not use localhost as the API URL — it resolves to the WordPress container.
- • Docker Desktop:
http://host.docker.internal:8000 - • Linux (same server):
http://172.17.0.1:8000 - • Same Docker network:
http://api:8000
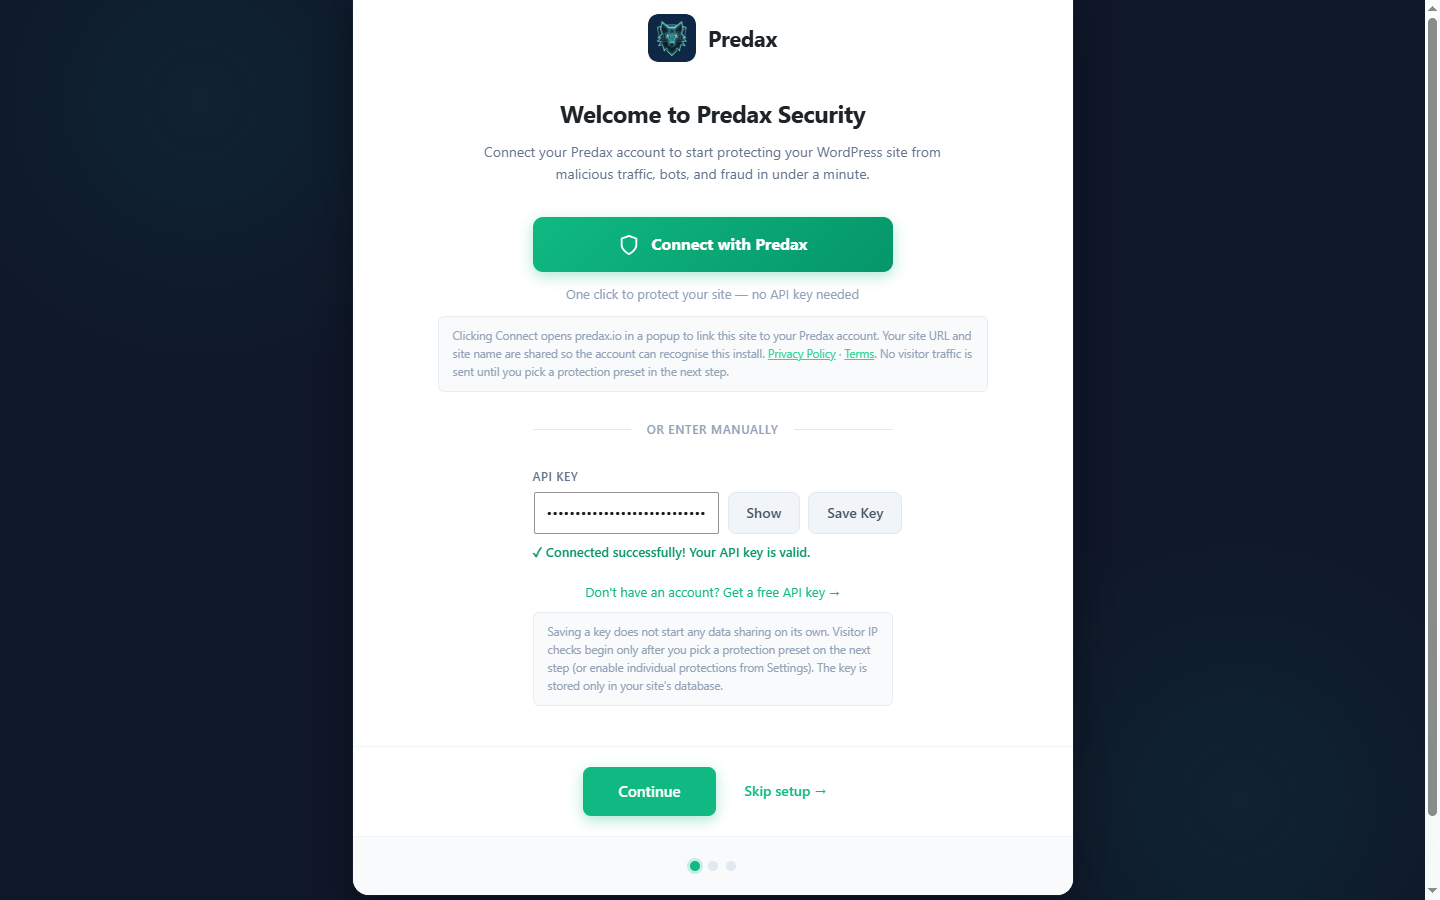
3. Pick a preset (setup wizard)
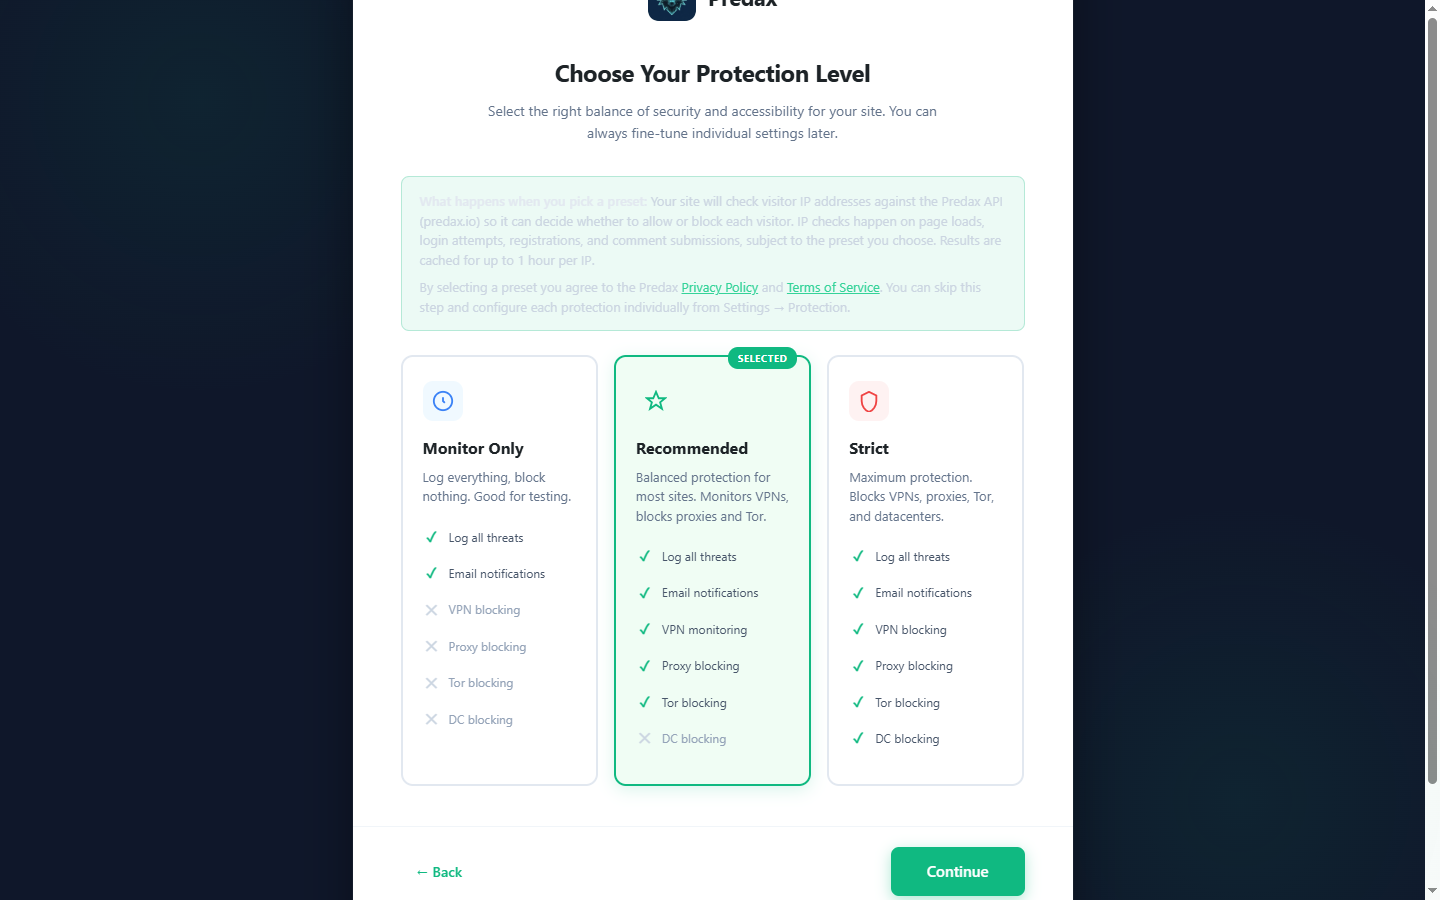
On first run the setup wizard offers three presets. Each preset chooses which entry points are protected (visitor screening, login, registration, comments) and how each threat signal is handled. You can adjust any individual setting afterwards.
| Preset | What it does | Use when |
|---|---|---|
| Monitor Only | Screens visitors and logins but blocks almost nothing: no signal blocks, VPN and proxy set to Monitor, risk threshold 90. Everything is logged to the Threat Log. | You want a week of real data before deciding what to block. Safest starting point. |
| Recommended | Blocks proxies, Tor, and known-malicious IPs; monitors VPNs; risk threshold 50. Visitor + login protection on. | Most sites. Blocks the signals that are almost never legitimate, without turning away VPN readers. |
| Strict | Additionally blocks VPNs and datacenter IPs, protects registration + comments, risk threshold 30. | High-abuse targets. Expect real visitors to be blocked — VPN users are a meaningful share of normal audiences. |
Visitor screening checks page loads, not just form submissions. Logged-in users are skipped, and each visitor's verdict is cached for 5 minutes, so a normal site makes roughly one API call per unique visitor per 5 minutes. Reverse-DNS-verified search-engine crawlers (Googlebot, Bingbot) are exempt from policy rules — datacenter, VPN, geo, and risk-threshold blocks never apply to them, so screening cannot hurt your search rankings. Threat rules (Tor, known-malicious, firewall) still apply to everyone.
4. Threat signals
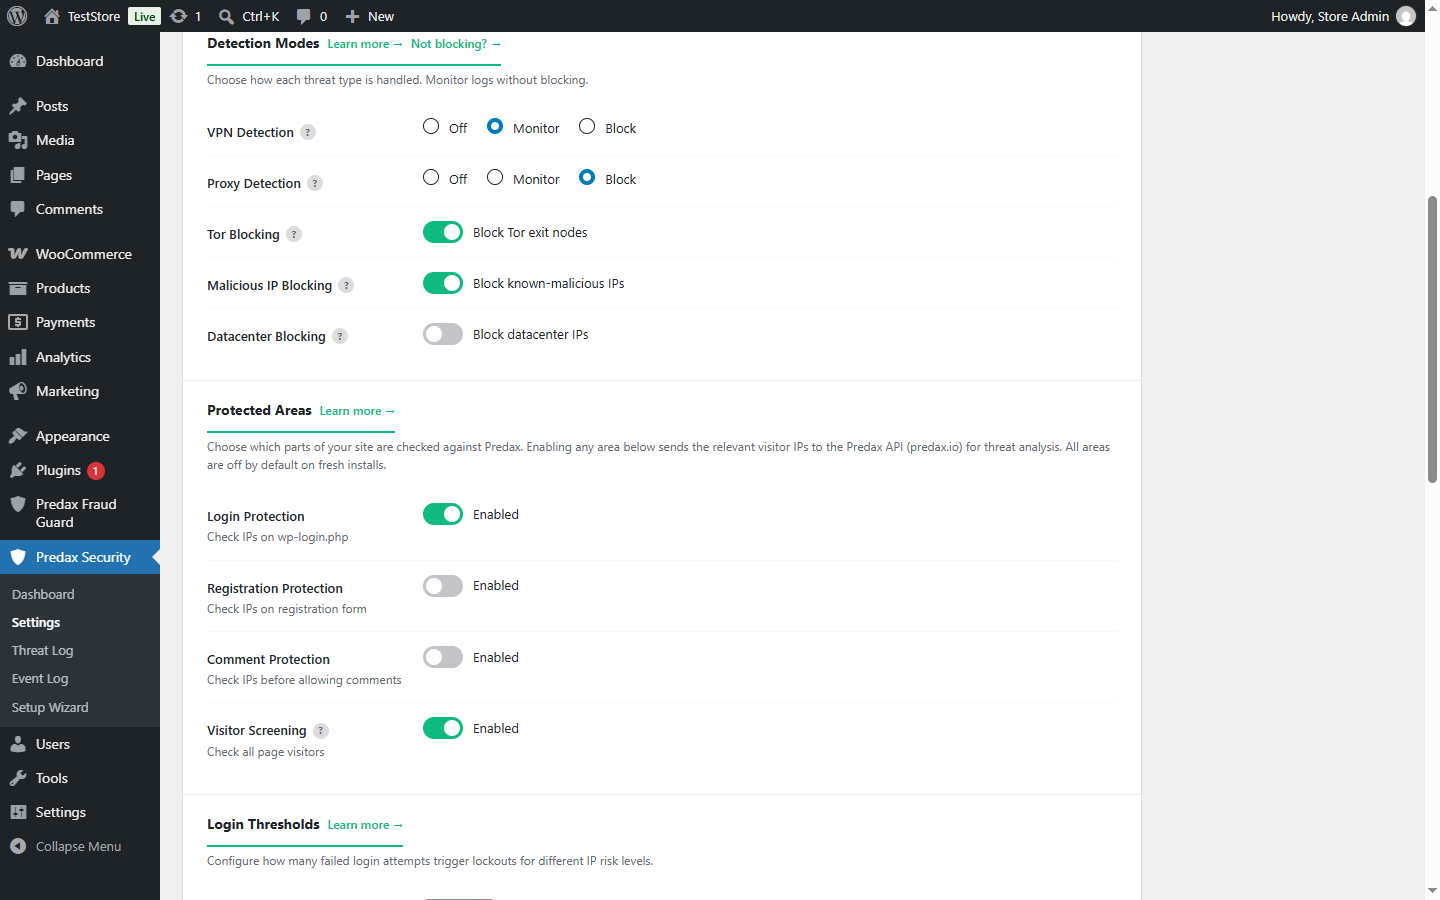
Each threat signal can independently be set to Block, Monitor, or Off regardless of the risk threshold.
| Signal | Recommended | Notes |
|---|---|---|
| VPN | Monitor | A meaningful share of ordinary visitors browse over VPNs. Block only if your threat log shows VPN traffic is genuinely abusive. |
| Proxy | Block | Open and anonymous proxies are strong abuse signals with few legitimate users |
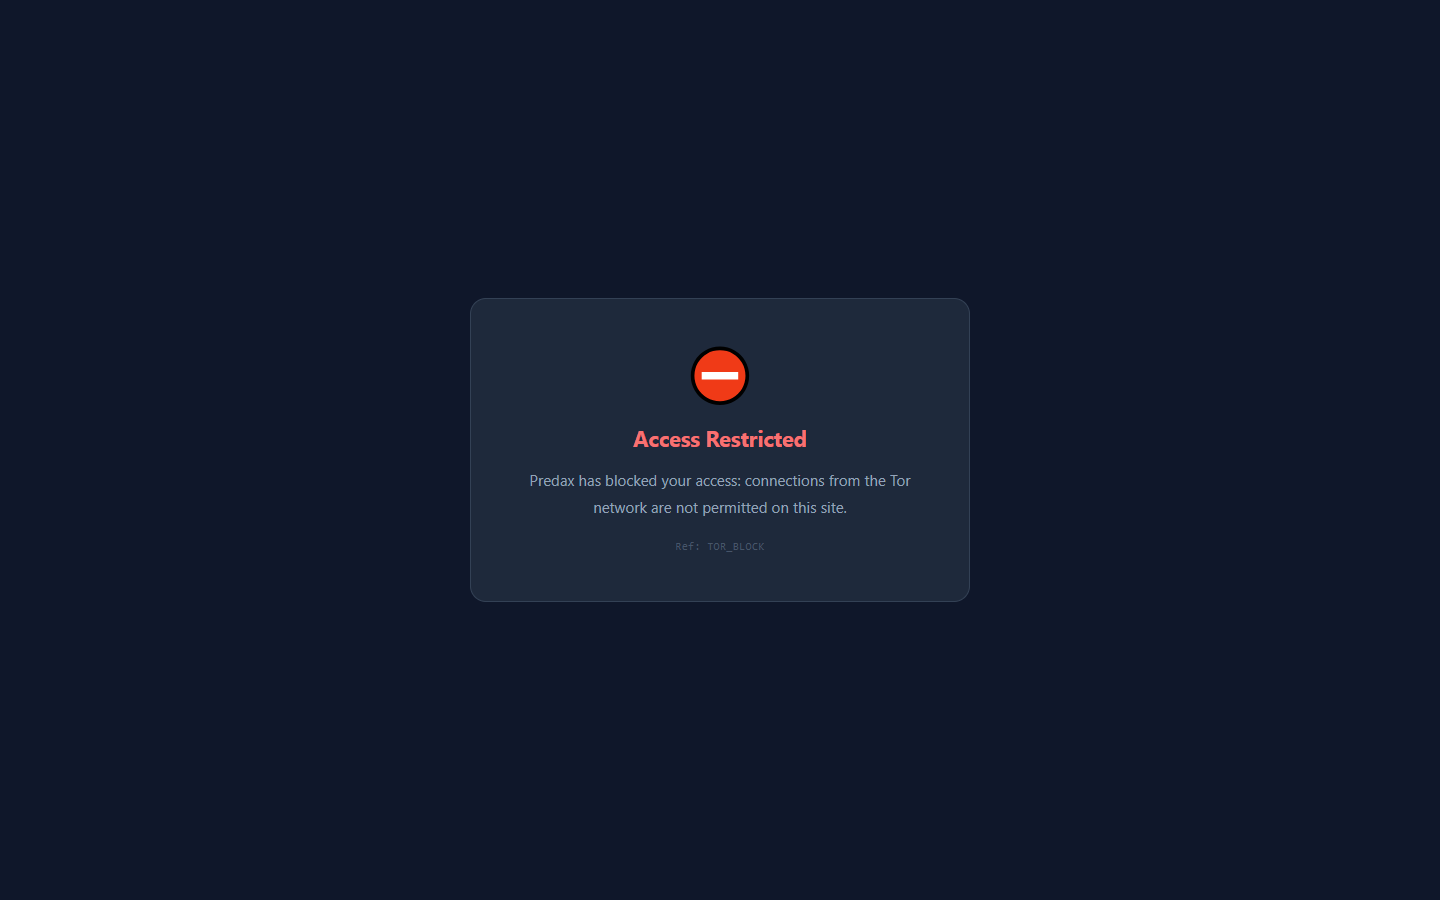
| Tor exit node | Block | Very high-risk in most contexts |
| Known-malicious IP | Block | IPs on active threat feeds (botnet C2, attack sources) |
| Datacenter IP | Off / Monitor | A hosting fact, not a verdict — catches scrapers, but also monitoring tools and corporate egress. Note most VPN IPs are also datacenter IPs. |
5. Risk threshold
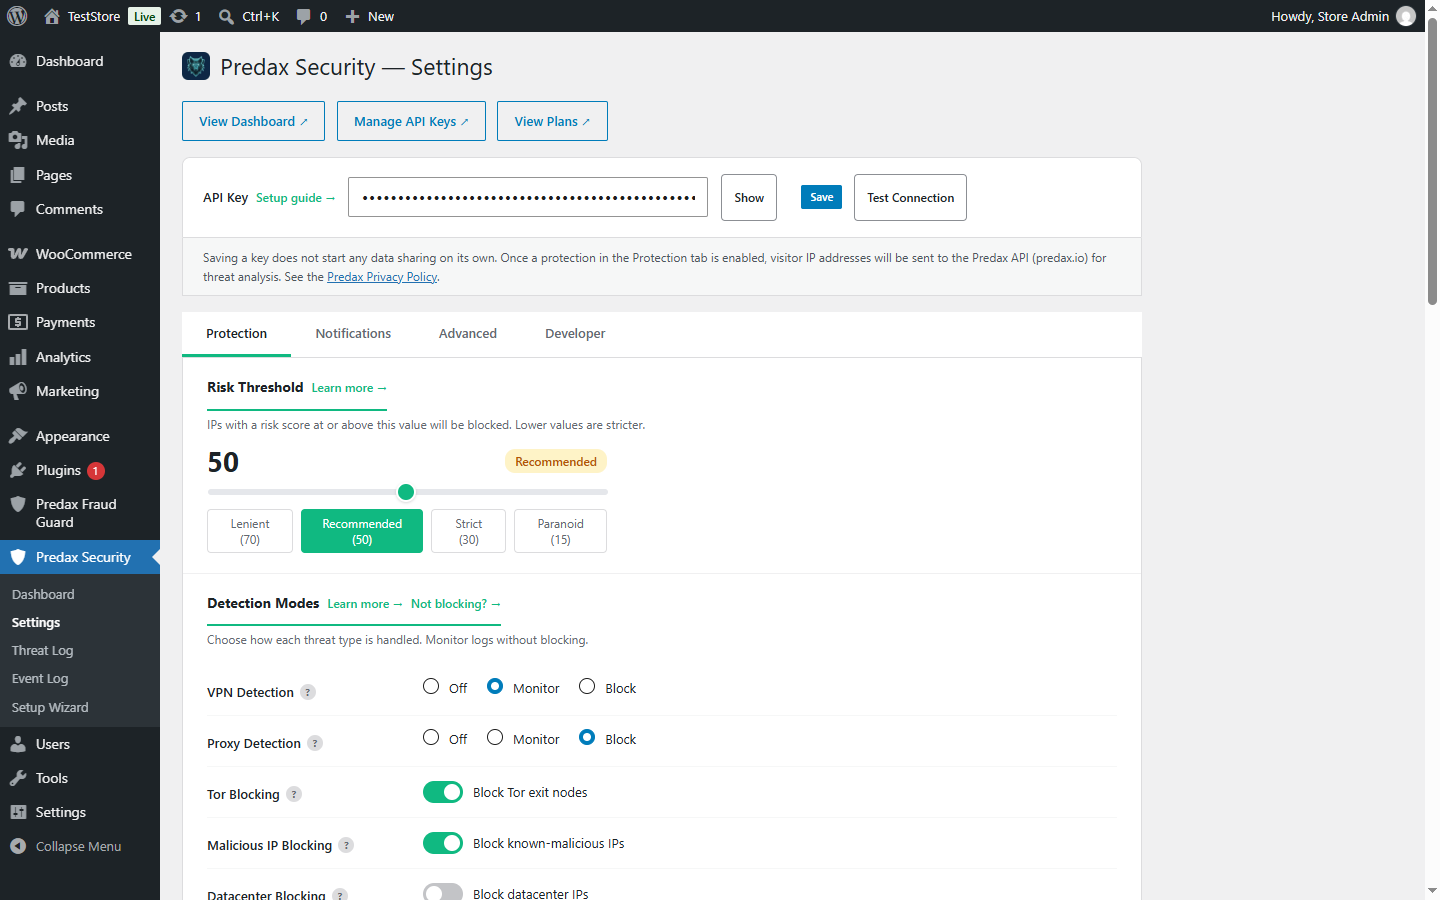
The risk threshold (1–100) is the score at or above which an IP is blocked even when no individual signal rule fires. The default is 50 (the Strict preset uses 30, Monitor Only uses 90).
To choose a value, it helps to know how the score is built: it is a weighted sum of signals, and with default weights a Tor exit alone scores 85, an anonymous proxy 75, a VPN 45, and a plain datacenter IP 35. So at threshold 50, a single “VPN” or “datacenter” signal does not block on its own — an IP has to carry a stronger signal, or several signals at once. Lowering the threshold below 45 starts blocking every VPN visitor; raising it toward 90 blocks only IPs with overwhelming evidence. Prefer adjusting the per-signal Block/Monitor controls first and treat the threshold as the backstop.
6. Whitelist & blacklist
The whitelist bypasses all Predax checks. Always add your own IP before enabling aggressive rules. The blacklist hard-blocks IPs regardless of their risk score. Both accept individual IPs or CIDR ranges (one per line or comma-separated).
# Whitelist examples
203.0.113.42
10.0.0.0/8
# Blacklist examples
185.65.50.0/24
7. Geo-blocking
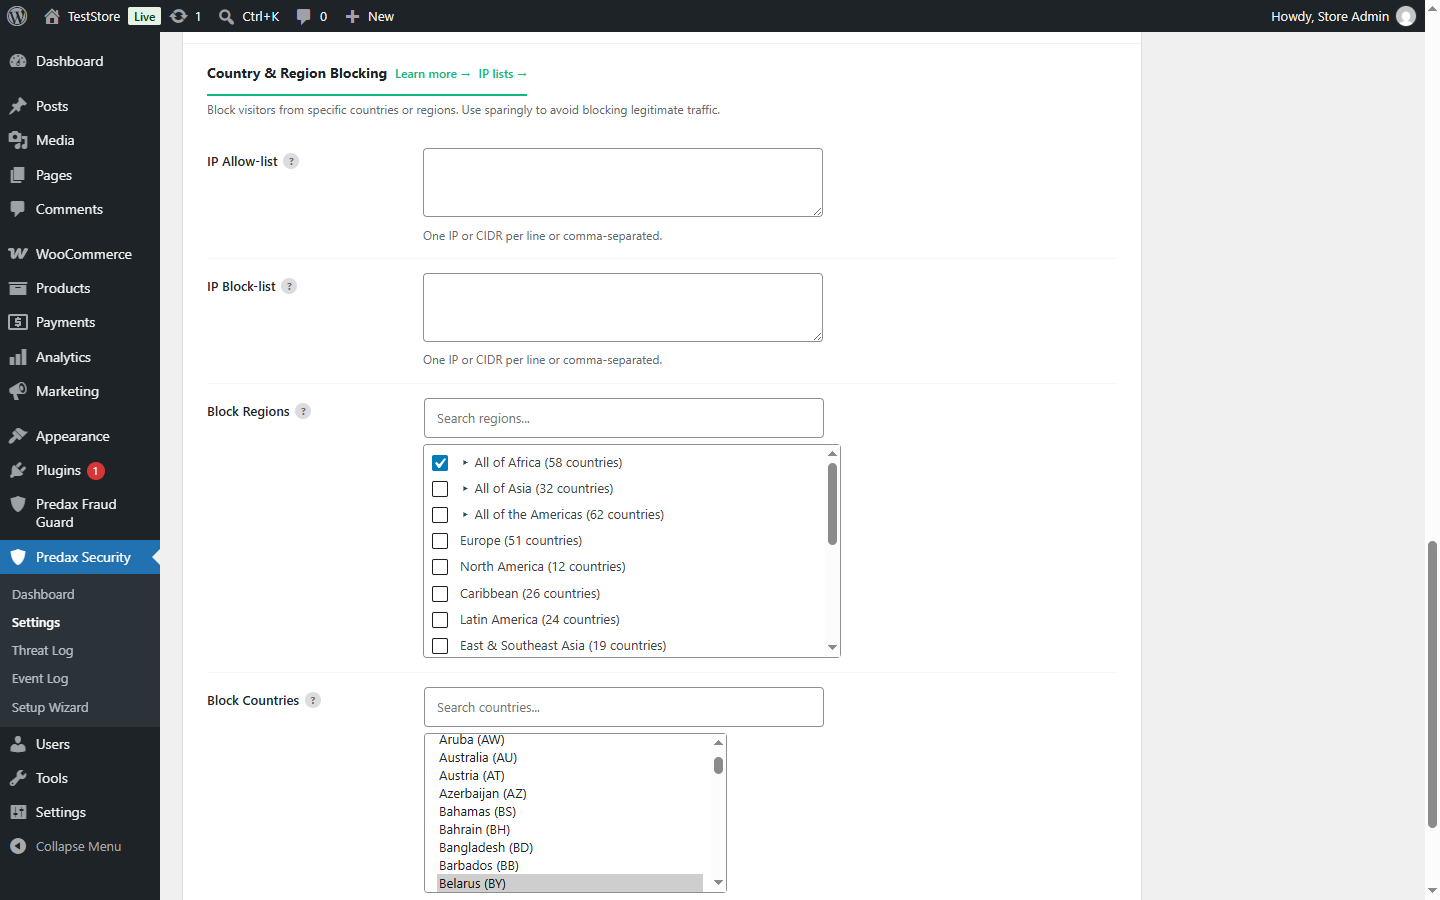
You can block by individual country or by world region (Europe, Asia Pacific, etc.). Region blocking applies to all enabled entry points — login, registration, comments, and visitor protection. Always test with a country you don't block before going live.
8. Custom scoring weights
The plugin sends optional per-user scoring weights with each API call. Configure these in the Custom Scoring section of the plugin settings, or manage them centrally from your Predax dashboard. Weights let you tune how much each signal (VPN, proxy, ASN reputation, etc.) contributes to the risk score for your specific traffic profile.
9. Verify
- 1Try a login attempt from a known VPN IP (you can test via your dashboard lookup tool).
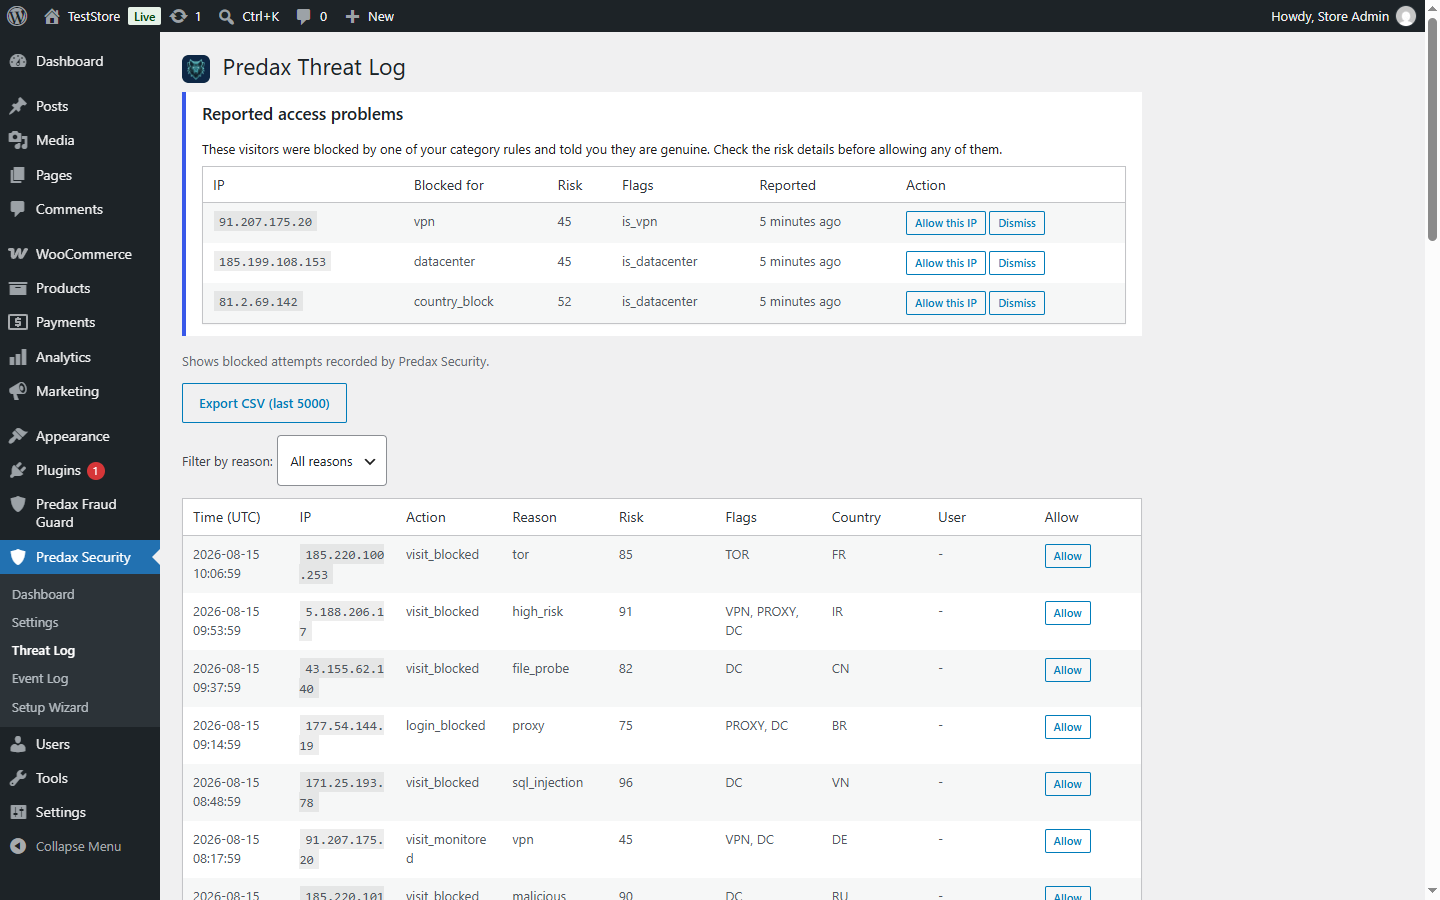
- 2Check Predax Security → Threat Log — the blocked event should appear within seconds.
- 3Confirm the entry shows the correct action (block/monitor), reason, risk score, and country.
- 4Check the WP Admin dashboard widget for a summary of recent activity.
Troubleshooting
Test Connection fails
Check the API key is correct and starts with prdx_. If WordPress is in Docker, the API base URL may need updating — see the Docker note in step 2.
Legitimate users are being blocked
Check the Threat Log to see which rule actually fired — the reason column names it. If it is "VPN" or "datacenter", switch that signal from Block to Monitor. If it is "risk_threshold", raise the threshold (e.g. 50 → 70). And add your own office/home IPs to the whitelist.
No entries in Threat Log
Ensure the protection mode for at least one entry point is set to Block or Monitor (not Off). The log only records events when Predax actually processes a request.
Visitor protection is blocking logged-in admins
Visitor screening automatically skips logged-in users. If you're seeing blocks, you were likely logged out (or in a private window) at the time — add your IP to the whitelist to be safe.
Screening stopped working mid-day
If your plan's daily IP checks are used up, the plugin pauses screening and allows traffic through (it fails open, never locking visitors out). A notice appears on the plugin pages; screening resumes automatically at 00:00 UTC. The free plan includes 1,000 checks/day — each unique visitor is checked at most once per 5 minutes, so this covers roughly 1,000 unique visitors per day.